REVIEW · STOCKHOLM
Magical “Stockholm by Night” Photo Walk
Book on Viator →Operated by JP Photo · Bookable on Viator
Low light can turn ordinary streets into great photos. This Stockholm by Night photo walk teaches you how to see and shoot the city after dark, with practical guidance timed for real nightfall.
I like how the focus stays on learning techniques you can use right away, especially long exposure for light trails. I also like the human side: Julien’s patient, hands-on help, plus the traditional Swedish fika break.
The main consideration is that night shooting is demanding. A tripod is strongly recommended, and without one your results can still improve, but you’ll have less control in the darker corners.
In This Review
- Key highlights if you’re choosing this photo walk
- Why the walk starts right after sunset (and why that matters)
- Long exposure for light trails: the skill you’ll actually take home
- Tripod: optional, but you’ll feel the difference
- Stockholm Old Town: practicing night framing where light is strongest
- Riddarholmen: using low light to get cleaner, more intentional images
- Mariaberget and the iPhone-to-pro look: shooting from a higher angle
- Flashlights help more than you’d think
- Stockholm City Hall glow: when to slow down and use stability
- The fika break: Sweden’s way of making photo learning less stressful
- What’s included, and how that affects value at $159.07
- Who should book this photo walk (and who might prefer something else)
- Should you book Stockholm by Night?
- FAQ
- What is the duration of the Stockholm by Night photo walk?
- How much does the tour cost?
- Where does the tour start?
- What are the main stops during the walk?
- Do I need a tripod?
- What’s included in the tour price?
- Is the tour private, and what if the weather is bad?
Key highlights if you’re choosing this photo walk

- Sunset-to-night timing: you start just after sunset when the light shifts fast.
- Long exposure training: you’ll work on capturing the movement of cars and trains as light trails.
- Phone-friendly instruction: Julien demonstrates iPhone features you may not be using.
- A practical gear boost: included flashlights help you aim and compose in the dark.
- Fika counts: you get traditional Swedish fika (coffee and a cinnamon bun).
- Private group experience: it’s only your group, guided in English.
Why the walk starts right after sunset (and why that matters)
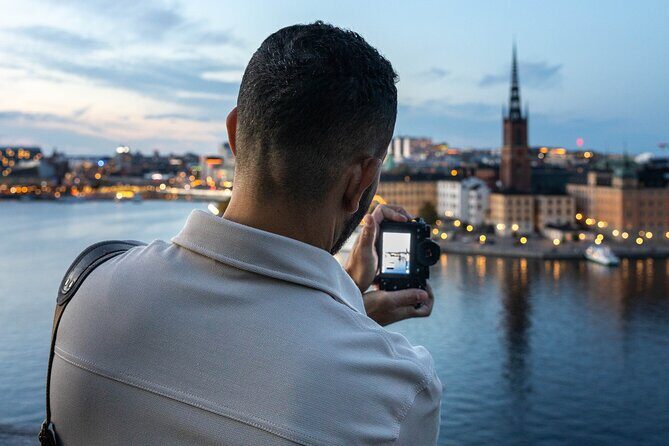
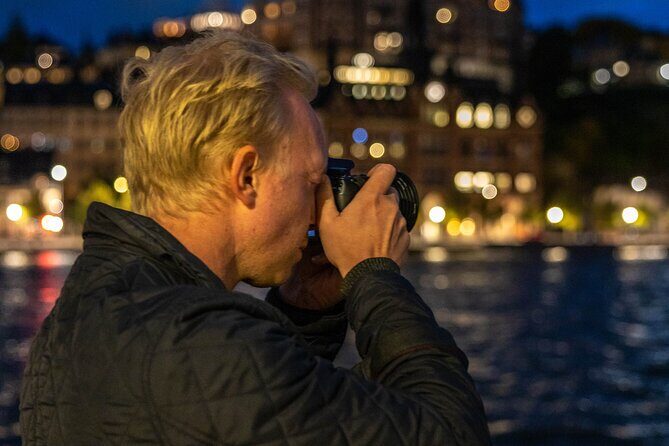
Night photography isn’t just about darkness. It’s about the transition. This photo walk begins just after sunset, when the sun has just disappeared and the city lights start to take over. That short window is where Stockholm looks especially cinematic, because you get both lingering ambient glow and the sharp points of light from streets and buildings.
What you’ll do here is learn to work with that change instead of fighting it. The guide’s approach makes sense: start when the city is already turning on its lighting, then practice how to build a shot with low light. If you’ve ever tried night photos and ended up with blurry images, you already know why this timing helps. You’re not just guessing in pitch black—you’re learning while the scene is still giving you usable light.
Also, the walk is only about two hours, so the pace is designed for quick learning. You’ll spend less time wandering and more time getting feedback on composition and settings.
You can also read our reviews of more walking tours in Stockholm


Long exposure for light trails: the skill you’ll actually take home
The heart of this experience is teaching you how to master low light, with a technique called long exposure. In plain terms: long exposure lets the camera keep recording while motion happens. The result is that moving sources of light—like cars and trains—turn into visible streaks across your image.
That’s the “wow” effect most people hope for, but it doesn’t happen by accident. You need stability and you need to understand what you’re doing when you slow the shutter down. That’s where having a guide matters. Julien can steer you toward the right habits on the spot—how to stabilize, how to frame, and how to make the light do something instead of just showing up as noise.
Tripod: optional, but you’ll feel the difference
The tour recommends bringing a tripod because night conditions are tough. You can still join with a camera or even a phone, and that’s a real plus if you travel light. But if your goal is crisp long exposures and cleaner light-trail results, a tripod gives you control.
If you don’t bring one, you can still learn the basics and improve your shots. Just expect that some techniques will be harder to nail. Think of it this way: a tripod turns night photography from a gamble into a repeatable process.
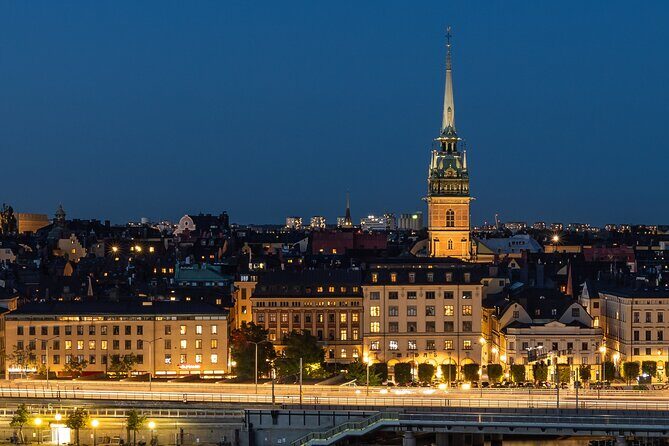
Stockholm Old Town: practicing night framing where light is strongest
Old Town is a smart first stop for a photo walk like this because it’s full of light sources that your camera (or phone) can work with. At night, you want strong anchors—areas where the image has clear points of interest rather than turning into a dark blur.
At this stage of the walk, you’re also early enough that you can focus on the fundamentals without getting rushed. You’ll likely be practicing how to:
- position yourself for better composition
- use available light without overexposing everything
- plan for longer exposure shots where movement becomes the subject
This is also where the guide’s patience really helps. Night photography requires small adjustments—move a step, change your angle, reframe, try again. The value of a guide is that you don’t have to figure out every mistake alone.
One drawback to consider: early stops can be busy if many people are out after dark. If you’re sensitive to crowds, just keep a calm pace and be ready to wait for a clear shot or for movement to settle.
Riddarholmen: using low light to get cleaner, more intentional images
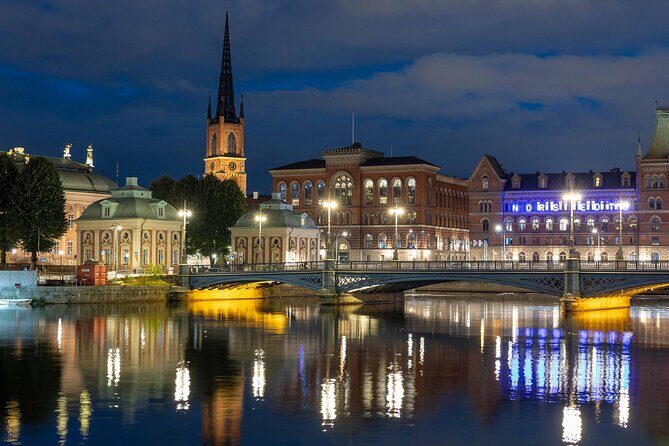
Riddarholmen is another strong night-photography stop on this route. The advantage here is the way the light behaves after dark. When the night scene has more contrast—dark areas paired with bright highlights—your compositions start to feel more deliberate.
This stop is where I’d focus on the “why” of the shot. Long exposure can produce great motion effects, but you still need to decide what you want to emphasize:
- the brightest elements
- the direction of light streaks
- the balance between dark space and illuminated detail
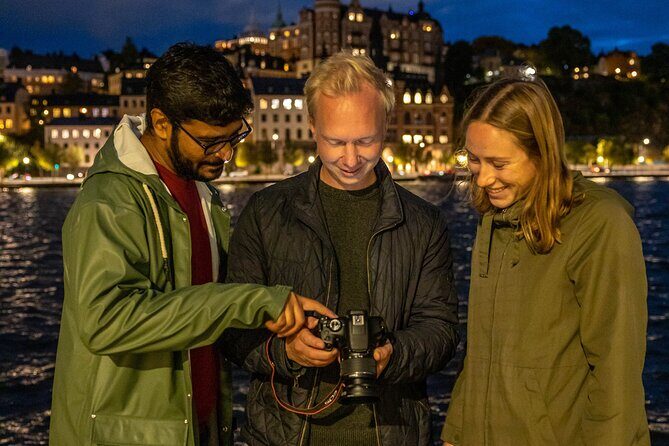
Julien’s feedback style matters because it pushes beyond simply taking photos. In one review, the guide pointed out optimal shooting tips and techniques along the way, which is exactly what you need. You’re not just learning a trick; you’re learning how to look at the scene like a photographer.
If you’re shooting on a phone, this is a good moment to pay attention to framing and steadiness. Phones can do impressive low-light work, but the details can shift depending on how you hold the device and how you compose.
You can also read our reviews of more evening experiences in Stockholm


Mariaberget and the iPhone-to-pro look: shooting from a higher angle
Mariaberget is one of the most practical stops for learning because higher viewpoints make it easier to see motion and light patterns. Even if you’re not sure what you’ll capture, this kind of setting usually gives you options: different angles, more visible light sources, and chances to experiment with the same scene in multiple frames.
This is also where the walk can feel especially rewarding if you’re traveling with just a phone. In feedback from the experience, Julien demonstrated iPhone features the person hadn’t used before. That kind of instruction is gold. Night settings can feel overwhelming on a phone because there are menus and modes everywhere. When a guide helps you figure out what matters, you stop wasting time—and your photos improve faster.
Flashlights help more than you’d think
Flashlights are included, which sounds like a small detail until you’re actually trying to shoot in the dark. They help you check framing, spot your surroundings, and adjust your position without feeling like you’re stumbling around. They also make it easier to move safely during the walk.
Stockholm City Hall glow: when to slow down and use stability
The final major stop is Stockholm City Hall. This is where the city’s night “presence” shows up clearly: bright built areas and strong lighting become ideal subjects for low-light practice.
By the time you reach this point, you should have a better sense of what you want your photos to look like. That means you can treat this stop as a chance to apply what you learned:
- practicing long exposure again once you know how stability affects the result
- comparing different framing choices
- refining composition so the photo looks intentional, not accidental
If you brought a tripod, this is where you’ll likely feel the payoff. Long exposure and stability go together. Your image sharpness improves, and your light trails become more consistent.
If you didn’t bring one, you’ll still get value from the instruction. You can focus on lighter compositions, careful positioning, and getting the angle right. It won’t replace a tripod for the longest exposures, but it can help you get cleaner results than handheld guessing.
The fika break: Sweden’s way of making photo learning less stressful
One of the nicest surprises is the snack stop. This walk includes traditional Swedish fika—coffee and a cinnamon bun—so you’re not just standing in the cold or staring at screens trying to get settings right.
Fika does two things in a photo tour:
- It gives your eyes a rest from constant bright highlights and dark shadows.
- It helps you think. A few minutes off-camera makes it easier to notice what’s working in your shots and what you should try next.
In reviews, people specifically called the fika moment a perfect break. That lines up with what I’d want from a night tour: a warm reset that keeps the mood up.
What’s included, and how that affects value at $159.07

At $159.07 per person for about two hours, the price can feel steep until you look at what’s actually included.
You’re getting more than a walking route. You’re paying for:
- guidance by a professional photographer and guide
- flashlights
- traditional Swedish fika
- a tailored route adapted to your experience level and interests
- local insight into Stockholm and Swedish culture
- an eBook about city photography after the tour
- a private experience (only your group)
That mix is what makes it good value. Night photography is one of those areas where self-teaching can be slow and frustrating. A pro guide shortens the learning curve because they can correct your technique in real time—things like how you frame, how you stabilize, and how you think about motion in long exposure.
Also, this walk is often booked in advance (on average about 30 days). That’s a good sign that the format works. It’s not just a casual photo stroll. It’s structured practice during a time of day that’s hard to time on your own.
Who should book this photo walk (and who might prefer something else)
This is a strong fit if:
- you want night photos that look planned, not accidental
- you’re using a camera or a phone and want clear guidance fast
- you like hands-on teaching where you get feedback while you shoot
- you want a Stockholm evening that includes culture and a snack, not just photo stops
You might consider a different option if:
- you dislike carrying a tripod or bulky gear (a tripod is recommended, even if optional)
- you expect a long, relaxed hang with no technique focus (this is instruction-heavy)
- you’re hoping for a sightseeing-only tour where photography is secondary (here, photography is the point)
Because it’s a private experience in English, it also works well if you want a quieter, more tailored pace compared with large group tours.
Should you book Stockholm by Night?
My take: if you’re serious about learning night photography, this is the kind of tour that pays off. You’re not just taking pictures in the dark. You’re learning why your camera (or phone) behaves the way it does at night, and you’re practicing the technique that creates the big results—long exposure and light trails.
If you can bring a tripod, you’ll likely get more consistent results and feel more confident about experimenting. Even without one, you’ll still benefit from Julien’s step-by-step help and the included flashlights and iPhone-focused tips.
Book it if you want a short, well-timed evening with real instruction, plus fika. Skip it if you only want general sightseeing or you’re unwilling to work with low light and repeated attempts.
FAQ
What is the duration of the Stockholm by Night photo walk?
It lasts about 2 hours.
How much does the tour cost?
The price is $159.07 per person.
Where does the tour start?
It starts at Stockholm City Museum, Ryssgården, 116 46 Stockholm, Sweden.
What are the main stops during the walk?
The route includes Stockholm Old Town, Riddarholmen, Mariaberget, and Stockholm City Hall.
Do I need a tripod?
A tripod is recommended because the lighting can be difficult, but it is optional. You can also join with a camera or a mobile phone.
What’s included in the tour price?
You get guidance by a professional photographer and guide, flashlights, an eBook about city photography after the tour, local insight into Stockholm and Swedish culture, snacks for a traditional Swedish fika, and a private experience.
Is the tour private, and what if the weather is bad?
Yes, it’s private for your group only and it’s offered in English. It requires good weather; if it’s canceled due to poor weather, you’ll be offered a different date or a full refund. You can also cancel up to 24 hours in advance for a full refund.